Chocolate Fig Ice Cream
IMG_8149.jpg
IMG_8136.jpg

The seasons are turning again, all is coming alive and green, and a hankering for cold dessert has come along with the sound of crickets filling warmed nights. A jar of fig jam and dark chocolate hidden away in my pantry were just begging to be used and with a surplus of eggs and cream left over from a family brunch, I whisked it all together one night when a new batch of richly flavored ice cream was on my mind. No extra sugar added, this dessert gets all its sweetness from fig and chocolate. Deep ruby jam and rich chunks of chocolate are swirled with this fruit sweetened chocolate cream to make for a truly decadent treat. This ice cream would pair excellently with strong espresso for a fantastic affogoto.

IMG_8200.jpg
IMG_8187.jpg
IMG_8139.jpg
IMG_8159.jpg
IMG_8199.jpg

Chocolate Fig Ice Cream

  • 2 cups low fat milk

  • 1 1/2 cups heavy cream

  • 6 egg yolks

  • 1/4 teaspoon salt

  • 1 teaspoon vanilla

  • 1/4 cup fig jam plus more for swirling into the ice cream

  • 1/2 cup dark chocolate chips or baking wafers

  • Approximately 1 cup roughly chopped dark chocolate

In a saucepan over medium-high heat, whisk together the heavy cream, milk, salt, and vanilla. When it feels warm to the touch, add the 1/2 cup of dark chocolate chips or wafers along with the fig jam and whisk until melted and combined. While the chocolate cream is mixture continues heating, whisk the egg yolks in a heatproof bowl. When the cream is steaming and has reached a temperature of 175 degrees, scoop 1/3 cup of the hot chocolate cream and whisk it into the egg yolks (do not skip this step, as pouring all the milk in at once will cause the eggs to curdle with the rapid temperature change). Continuing to whisk, add another 1/3 cup of the hot cream, then a final 1/3 cup. Finally, pour the remainder of the hot chocolate cream mixture into the bowl and whisk until completely combined. Allow to cool, then place in the refrigerator.

Chill the chocolate cream in the refrigerator overnight or for at least four hours until very cold.

After chilling, churn the custard according to your ice cream machine's directions. Spoon the ice cream into a freezer safe container and add the chopped dark chocolate and a few big spoonfuls of fig jam, swirling with a spoon. For a soft serve consistency, serve immediately. To firm the ice cream, place in a freezer-safe container and allow to freeze for at least 4 hours or overnight, then serve.

Gluten Free Pizza with Savory Fig Sauce, Goat Cheese, Shallots, Corn, and Vinegar Dressed Greens
IMG_8065.jpg
IMG_8084.jpg

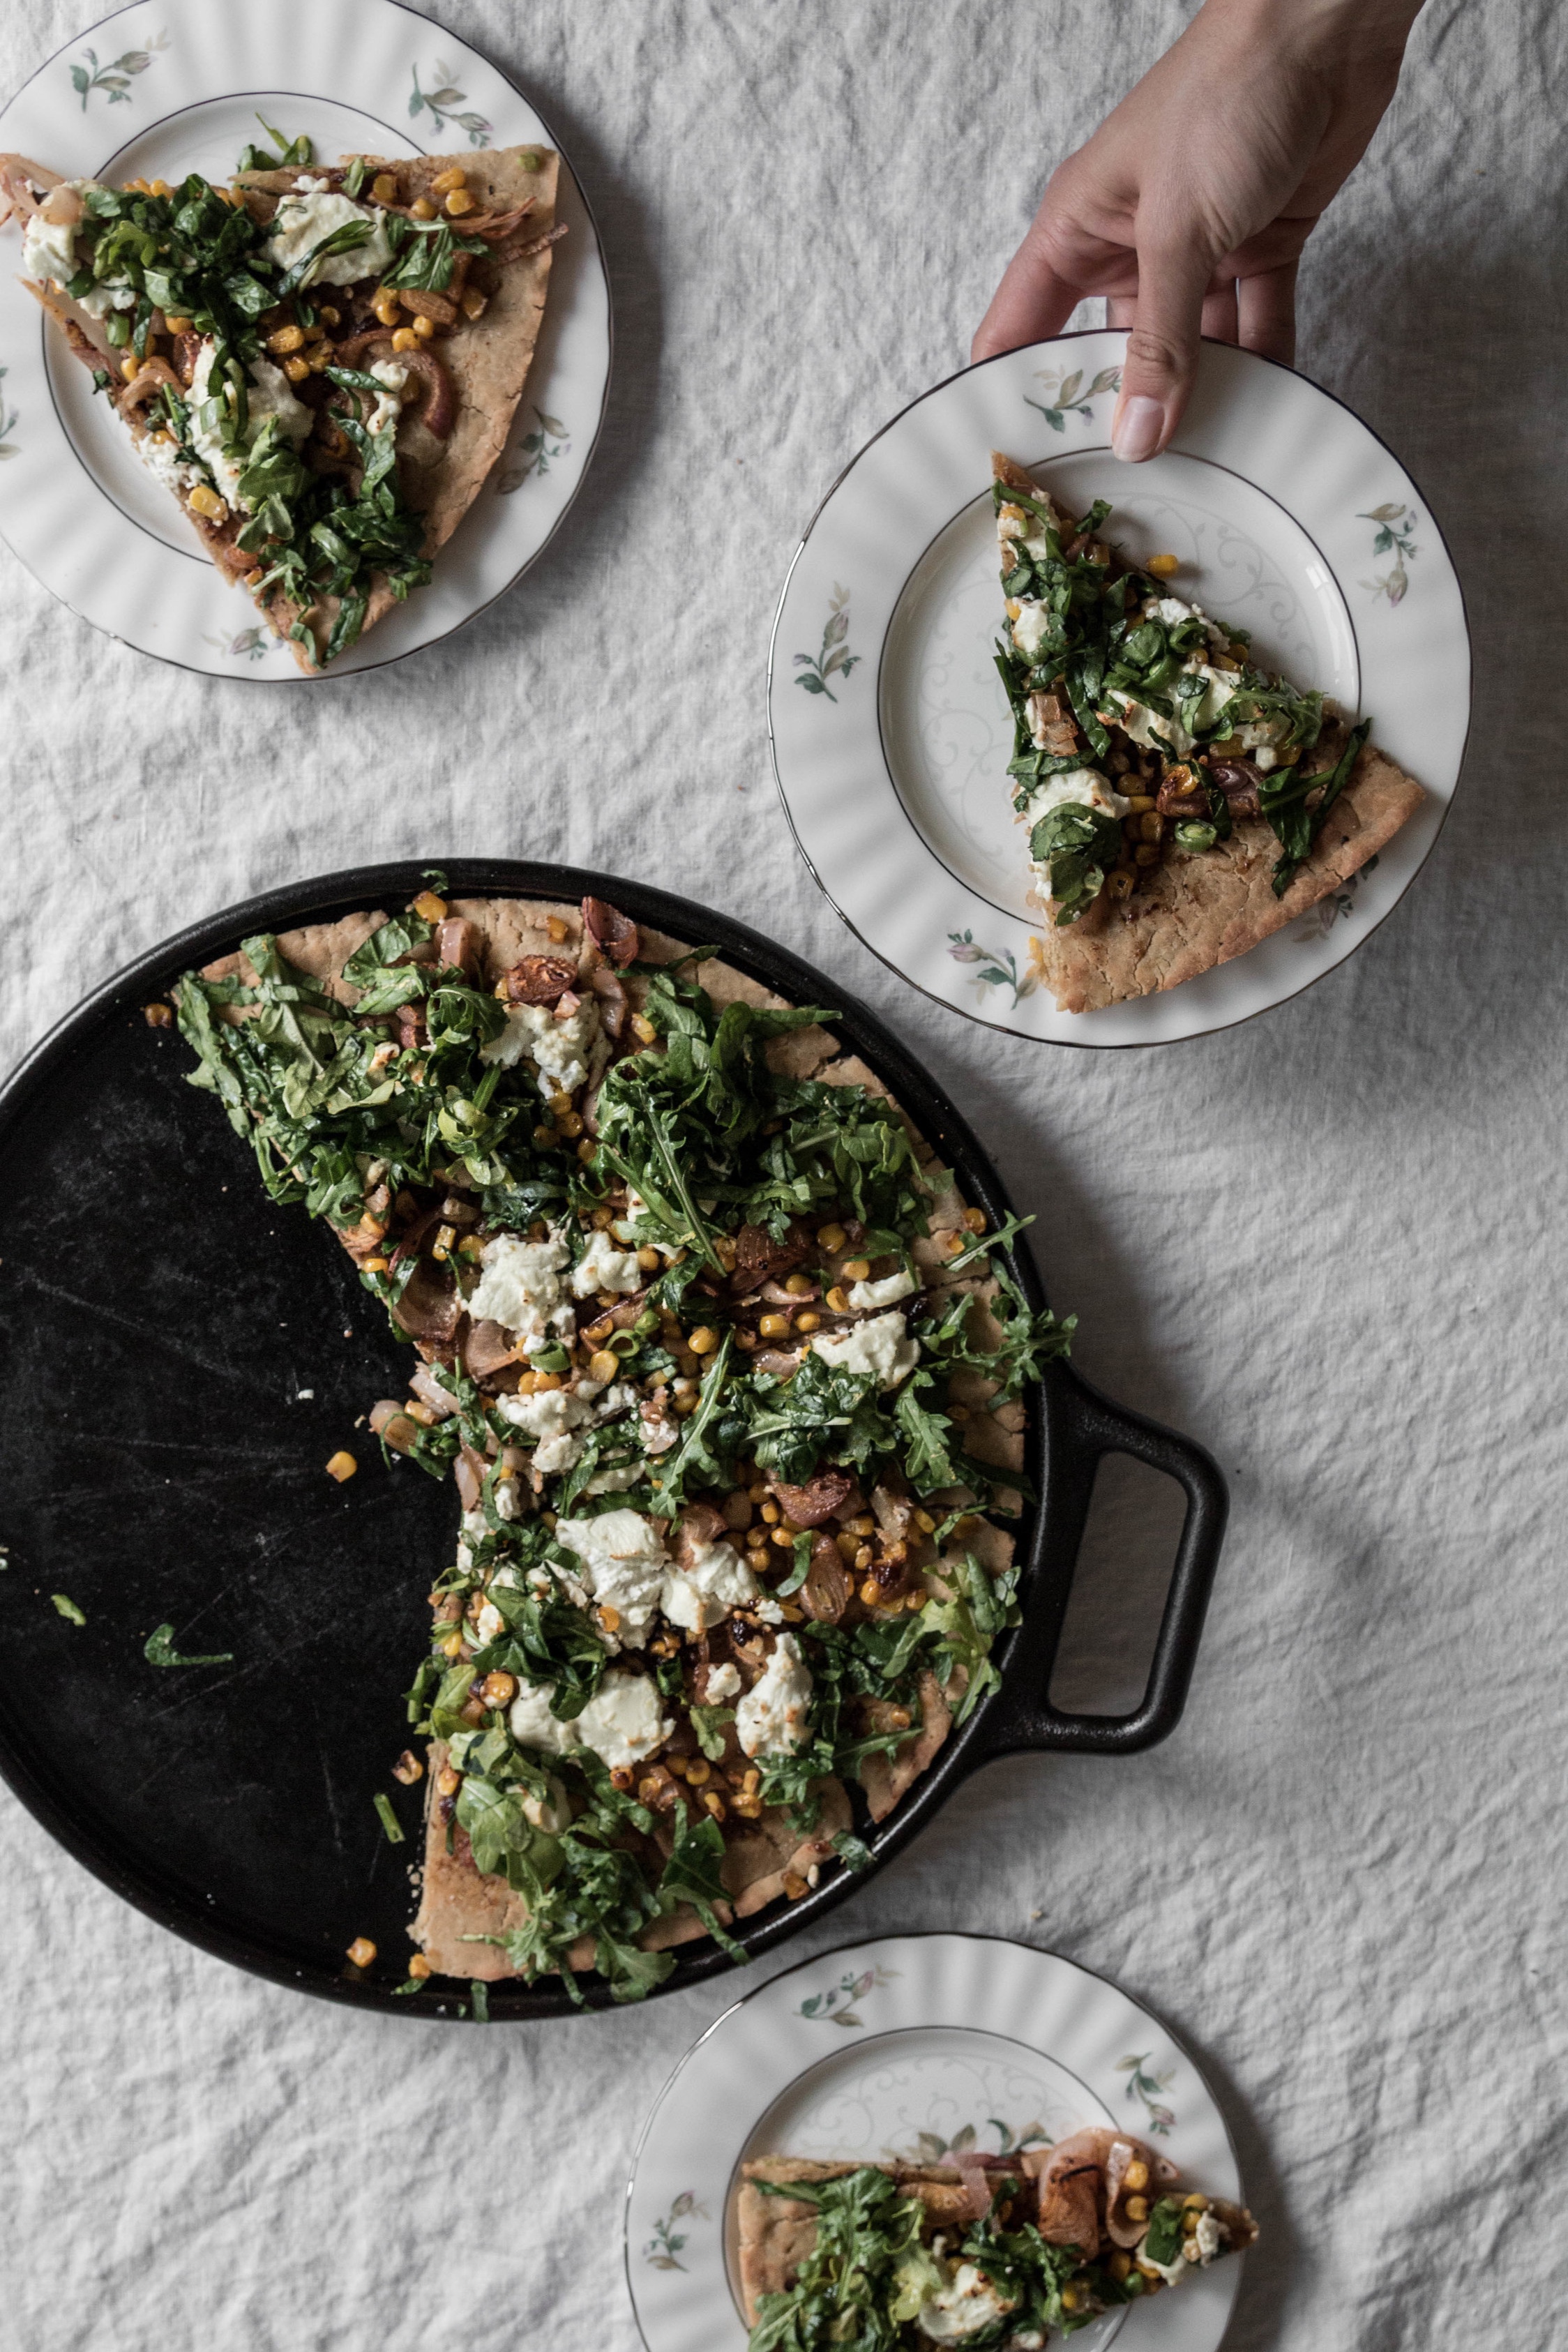
For many, a thought of pizza brings flavors of tomato, mozzarella, and perhaps pepperoni or a bit of basil to mind. Though that sort is undoubtedly classic, I tend to gravitate towards much less traditional flavors when assembling pizza in my own kitchen. This recipe is a juxtaposition of sweet and tangy from the fig and the vinegar, caramelized and creamy from the shallots and cheese, and earthy and tart from the chopped greens and lemon-vinegar dressing. This combination creates layers of differing flavor that’s both a bit unexpected and wholly delicious.

Some of my very favorite people are sensitive to gluten, causing me to explore gluten-free ways of feeding those around me. This crust is a delicious way to enjoy pizza if you or those you love find themselves with a food sensitivity or allergy. It’s very quick with little prep time required and the flavor is so enjoyable that I simply can’t decide which of my recipes I like better, sourdough or gluten-free. If you’re not in need of a gluten-free option, try these toppings on my sourdough pizza crust recipe.

IMG_8091.jpg
IMG_8100.jpg
IMG_8103.jpg
IMG_8093.jpg

Gluten Free Pizza with Savory Fig Sauce, Goat Cheese, Shallots, Corn, and Vinegar Dressed Greens

For the pizza dough:

  • 3 cups gluten free flour, King Arthur gluten free flour blend preferred

  • 3 tablespoons sugar

  • 1 packet active dry yeast mixed with 1/4 cup warm water

  • 1/4 cup olive oil

  • 1 teaspoon kosher salt

  • 1/2 teaspoon baking powder

  • Lukewarm water, starting with 1 cup

For the sauce:

  • 2 tablespoons fig jam

  • 2 tablespoons olive oil

  • Generous pinch of salt and grated black pepper

For toppings:

  • 3 shallots, sliced

  • 1/4 cup corn, fresh or frozen

  • 8 oz soft goat cheese

  • A few handfuls of spinach and arugula, roughly chopped

  • A handful of snap peas, thinly sliced

  • Zest of 1 lemon

  • Olive oil

  • Balsamic vinegar

  • Paprika, salt and pepper

Preheat the oven to 375 degrees. In a large mixing bowl, allow the packet of yeast mixed with warm water to sit until bubbling, a few minutes. Whisk in the sugar and olive oil, then the salt and baking powder. Finally, fold in the gluten free flour. Add 1 cup of lukewarm water and knead with your hands, adding more water until the dough just comes together. Roll the dough into a ball then flatten into a disc shape.

Oil a pizza pan or baking sheet then place the disc of dough onto the pan. With your hands, press the dough outwards then switch to a rolling pin if you’d like, pressing and rolling the dough on the pan until it’s quite thin.

Bake the pizza crust with no toppings for about 20 minutes or until it’s dry to the touch; this ensures you won’t end up with soggy pizza.

Whisk in a small bowl the sauce ingredients. In a medium bowl, toss the sliced shallots and corn with a drizzle of olive oil and a pinch of paprika, salt, and pepper. After the pizza is done baking without toppings, spread the sauce over the pizza and top with dollops of goat cheese, the shallots and corn. Return to the oven for 30 minutes.

In a medium sized bowl, toss the arugula, spinach, and snap peas with a drizzle of vinegar and the lemon zest. Top the pizza with the greens after baking and serve.

Blueberry and Herbes de Provence Scones
IMG_7990.jpg
IMG_8027.jpg

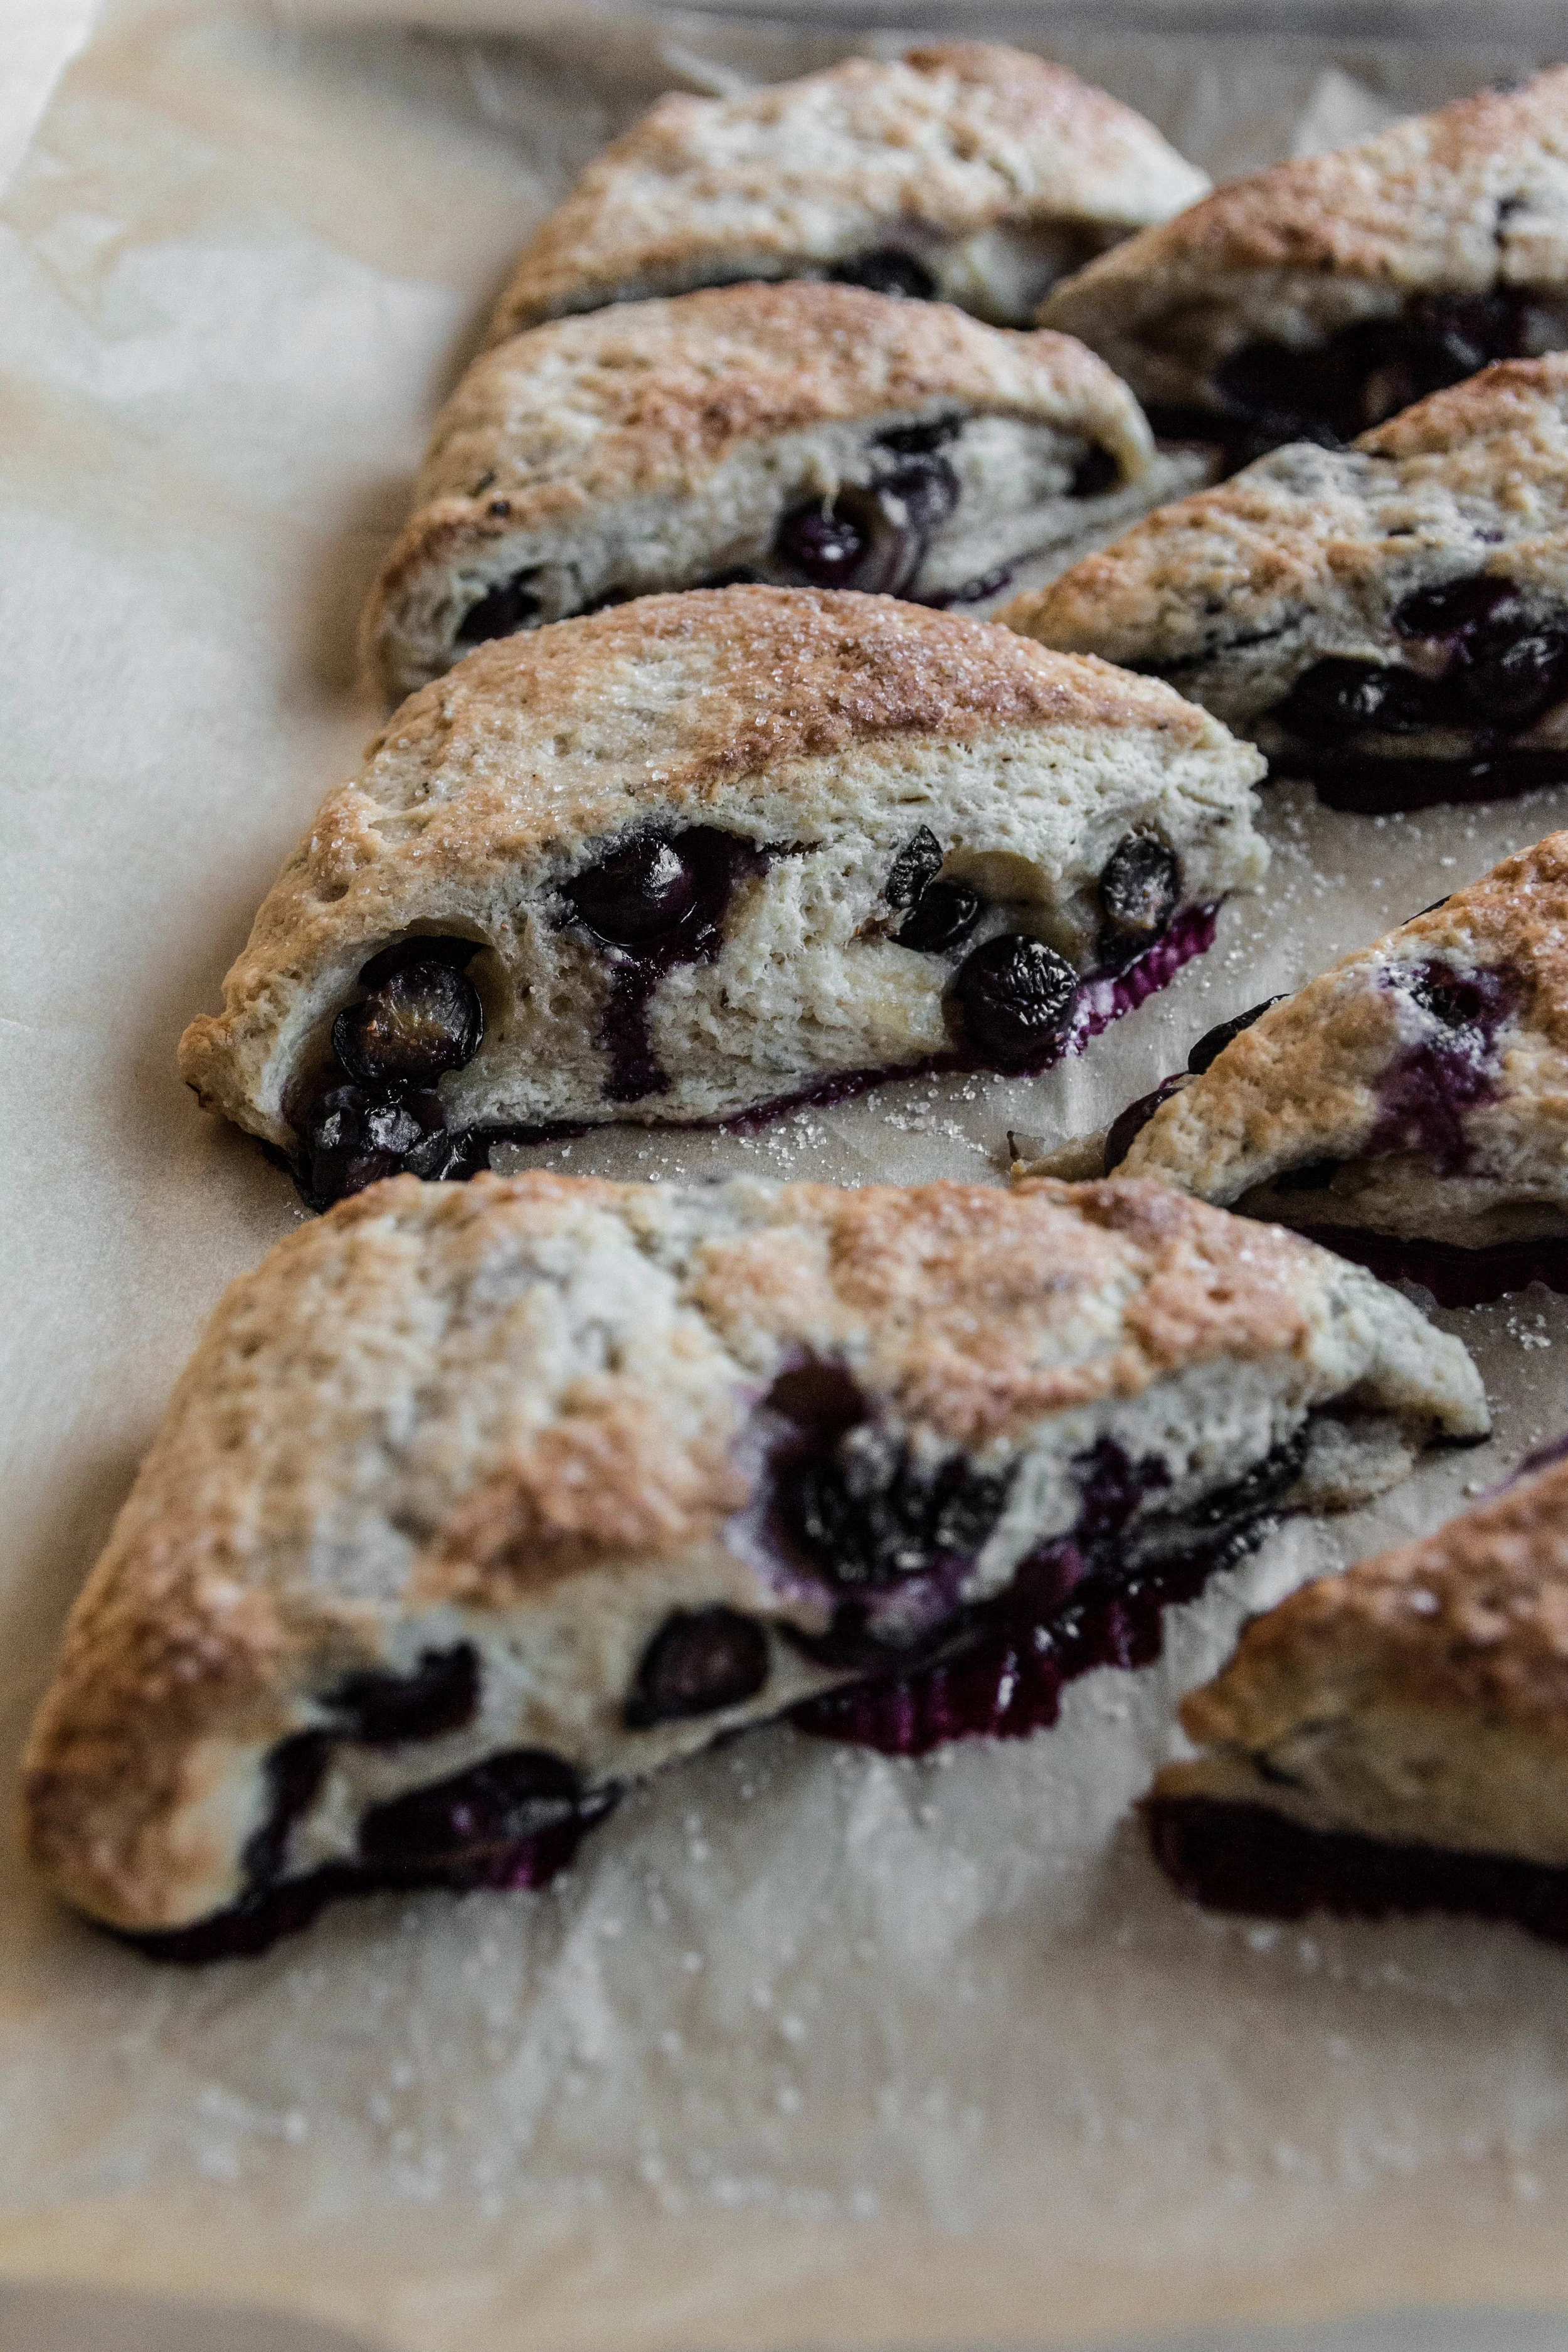
These blueberry and herbes de Provence scones graced my family table on Easter this year as our holiday Brunch treat. Flecked with thyme, basil, savory, fennel, and lavender flowers, a small spoonful of this French mix of herbs originated from the stunningly beautiful region of Provence gives a subtle sort of uniqueness to an otherwise blissfully familiar blueberry scone. The plump berries are folded between layers of buttery dough, bursting sweet purple juice during baking and forming a rustic pool of jam around each scone. Unlike other scone recipes that are overly sweet and too dry to be had without coffee to wash each bite down, this one produces pastries with a soft texture and restrained, modest sweetness. You can easily prepare them in advance; after cutting the dough into triangular pieces, chill them overnight to bake the next morning or store in the freezer for up to a month if you’re needing a stash of ready-made pastry.

IMG_8033.jpg
IMG_8024.jpg
IMG_8028.jpg
IMG_8030.jpg

Blueberry and Herbes de Provence Scones

makes 8 scones

  • 8 tablespoons unsalted butter, frozen

  • Approximately 8 oz fresh blueberries

  • 1/2 cup half and half

  • 1/2 cup full fat sour cream

  • 1 teaspoon vanilla

  • 2 cups all purpose flour

  • 1/3 cup sugar

  • 2 teaspoons baking powder

  • 1/4 teaspoon baking soda

  • 1/2 teaspoon salt

  • 1 teaspoon herbes de provence

  • Zest of 1 lemon

  • 1 tablespoon melted butter and 1 tablespoon sugar, for topping the scones

Preheat the oven to 425 degrees. Grate the frozen butter with a box grater and set aside. In a mixing bowl, whisk together the half and half, sour cream, lemon zest and vanilla. In a separate large mixing bowl, whisk together the dry ingredients - the flour, sugar, baking powder, baking soda, salt and herbes de provence. Toss in the grated frozen butter and mix until all the butter pieces are coated with flour, then pour in the liquid ingredients. Gently fold with a spoon or spatula until combined.

On a floured surface, knead the dough with your hands until it’s just come together. Using a rolling pin, roll the dough into a square approximately 12 inches on all sides. Fold the dough into thirds to create a long rectangle, then fold again to create a square. Roll the square of dough out again into approximately 12 inches by 12 inches. Sprinkle the fresh blueberries on top, pressing them into the dough, and roll the dough up over the berries to create a log. Press with your hands or rolling pin to flatten the log into a rectangle, then cut the dough into triangles - first cut the dough into four squares, then diagonally to create equal sized triangles.

If you’re making the scones ahead of time, you may stop here and refrigerate them for the next morning or freeze them for later use. When doing so, you can put the scones straight from the fridge or freezer into the oven; baking time may need to be adjusted.

To bake the scones, line a baking sheet with parchment and place the scones in an even distance from one another. Brush with the melted butter, then sprinkle with sugar. Bake for approximately 18 minutes or until just browned; do not over bake.

Dark Chocolate and Peanut Butter Maple Rice Krispie Bars
IMG_8047.jpg

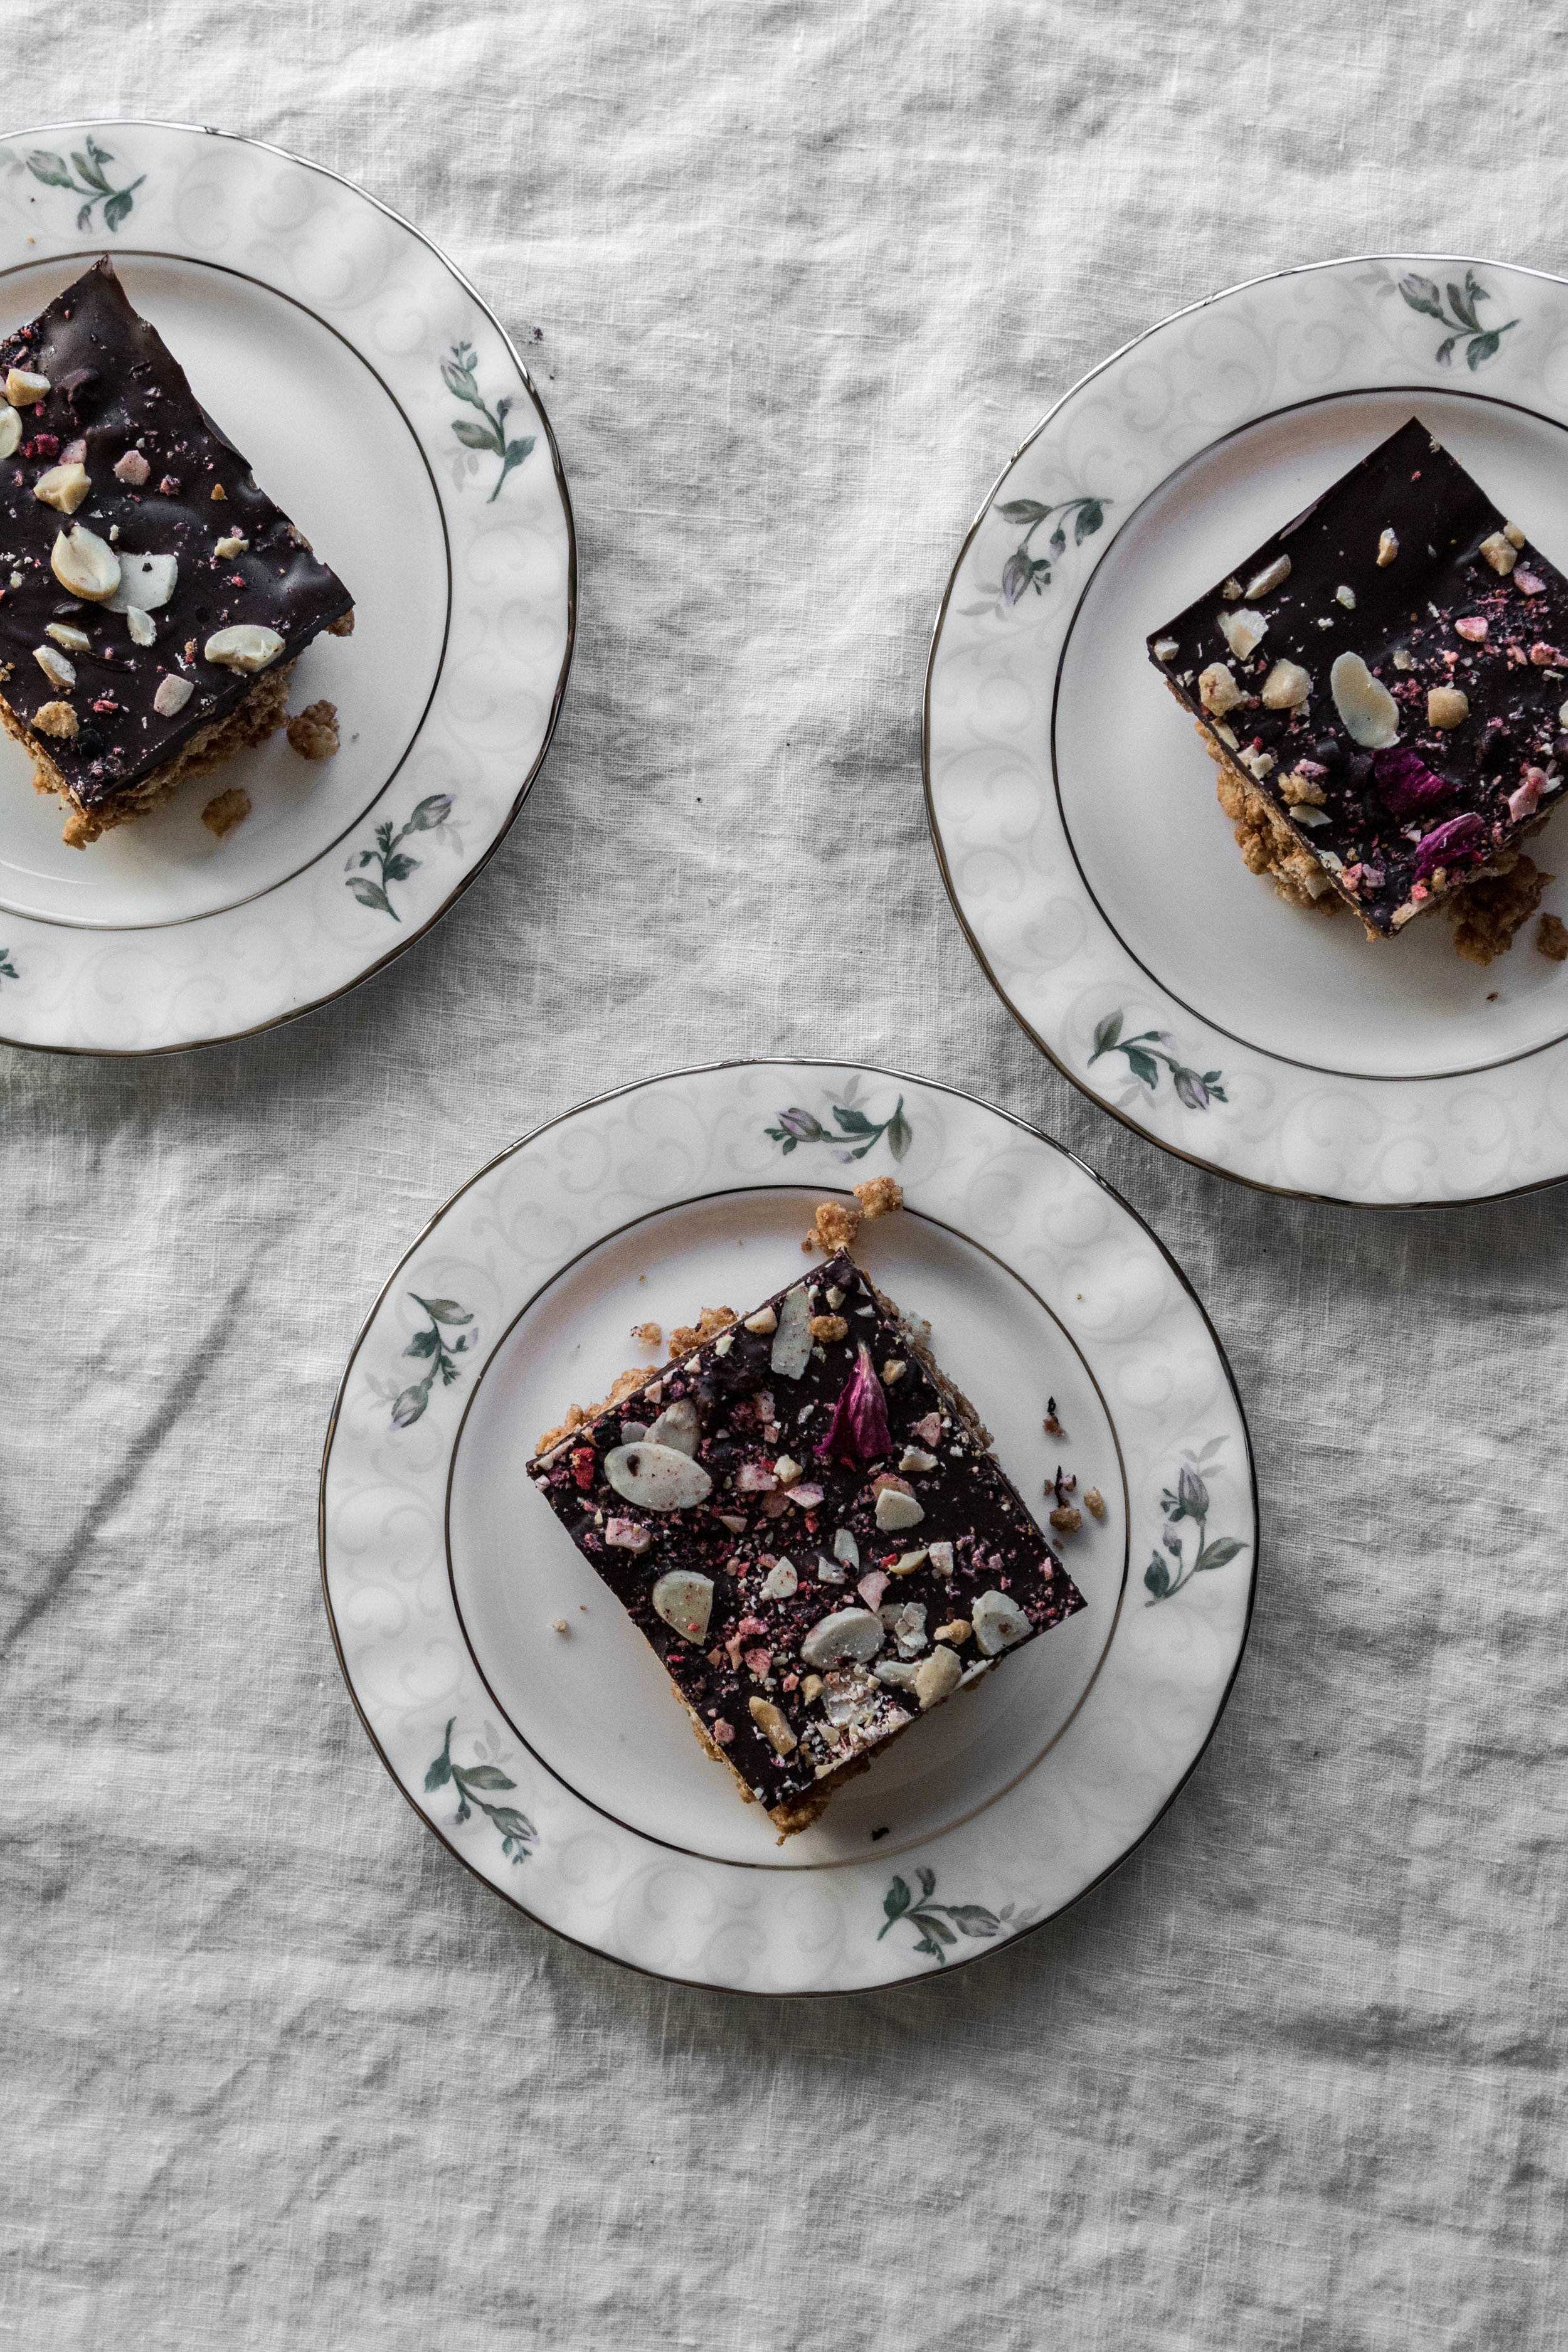
My mother’s chocolate and peanut butter Rice Krispie bars were one of our favorite treats growing up, reminding us all of home so much so that she would occasionally ship parcels of the thoroughly wrapped treats to homesick children just after we’d flown the nest. She would whip it all together in no time and within moments a dessert covered in glossy melted chocolate would be cooling on the counter and all our stomachs would suddenly feel starving. This is my simple adaptation of her original recipe, swapping out the white sugar and corn syrup listed on that well loved, chocolate-stain-speckled recipe card for a halved amount of maple syrup. I recommend using some good dark chocolate for melting over the bars if you can and like to have a bit of fun with the toppings; here I’ve sprinkled an assortment of sliced almonds, chopped peanuts, crushed freeze dried berries, cocoa nibs, sea salt and dried rose petal pieces from the garden - all optional. This recipe is a simple one with minimal ingredients and can be done in under ten minutes, a winning combination when that peanut butter and chocolate craving strikes.

IMG_8002.jpg
IMG_8043.jpg
IMG_8000.jpg
IMG_8057.jpg

Dark Chocolate and Peanut Butter Maple Rice Krispie Bars

  • 1 1/2 cups peanut butter

  • 3/4 cup maple syrup

  • 1 teaspoon vanilla

  • 4 1/2 cups Rice Krispies or other puffed rice cereal

  • Approximately 12 grams dark chocolate chips

  • Optional toppings: sea salt, chopped nuts, crushed freeze dried berries, cocoa nibs and torn dried garden rose petals.

In a heatproof bowl, melt the peanut butter and maple syrup together in a microwave for 1 minute - this makes them easier to combine and toss with the puffed rice. After heating, add the vanilla and whisk until homogenous. In a large mixing bowl, add the puffed rice cereal and add the maple and peanut butter mixture, tossing with a spatula until combined.

Line a baking dish with parchment paper and spoon the cereal into the dish. Press with hands or a spoon until it’s dispersed evenly and packed down. Sprinkle with dark chocolate chips and place under the broiler for a minute or two, until the chocolate has melted. Spread the melted chocolate chips to create a uniform layer of chocolate and allow to cool completely, either on the counter overnight or in the fridge. Before the chocolate has set, you can sprinkle it with the optional toppings, if you’d like. Serve cut in squares and store in the refrigerator.